


When All Things Point To The Laterals ?♂️
Check Before You Dig
It is true that a broken lateral, or several, could be the reason you are seeing sand on the floor of your pool and the majority of troubleshooting guides & “How To” articles will point you solely in that direction. Before you remove three hundred plus pounds of sand through a hole the size of a Frisbee, it is important to know that there are other components of the filter that, if damaged, can cause the same thing to occur. The best part is, not all of these other components require removing the sand in order to diagnose or replace.
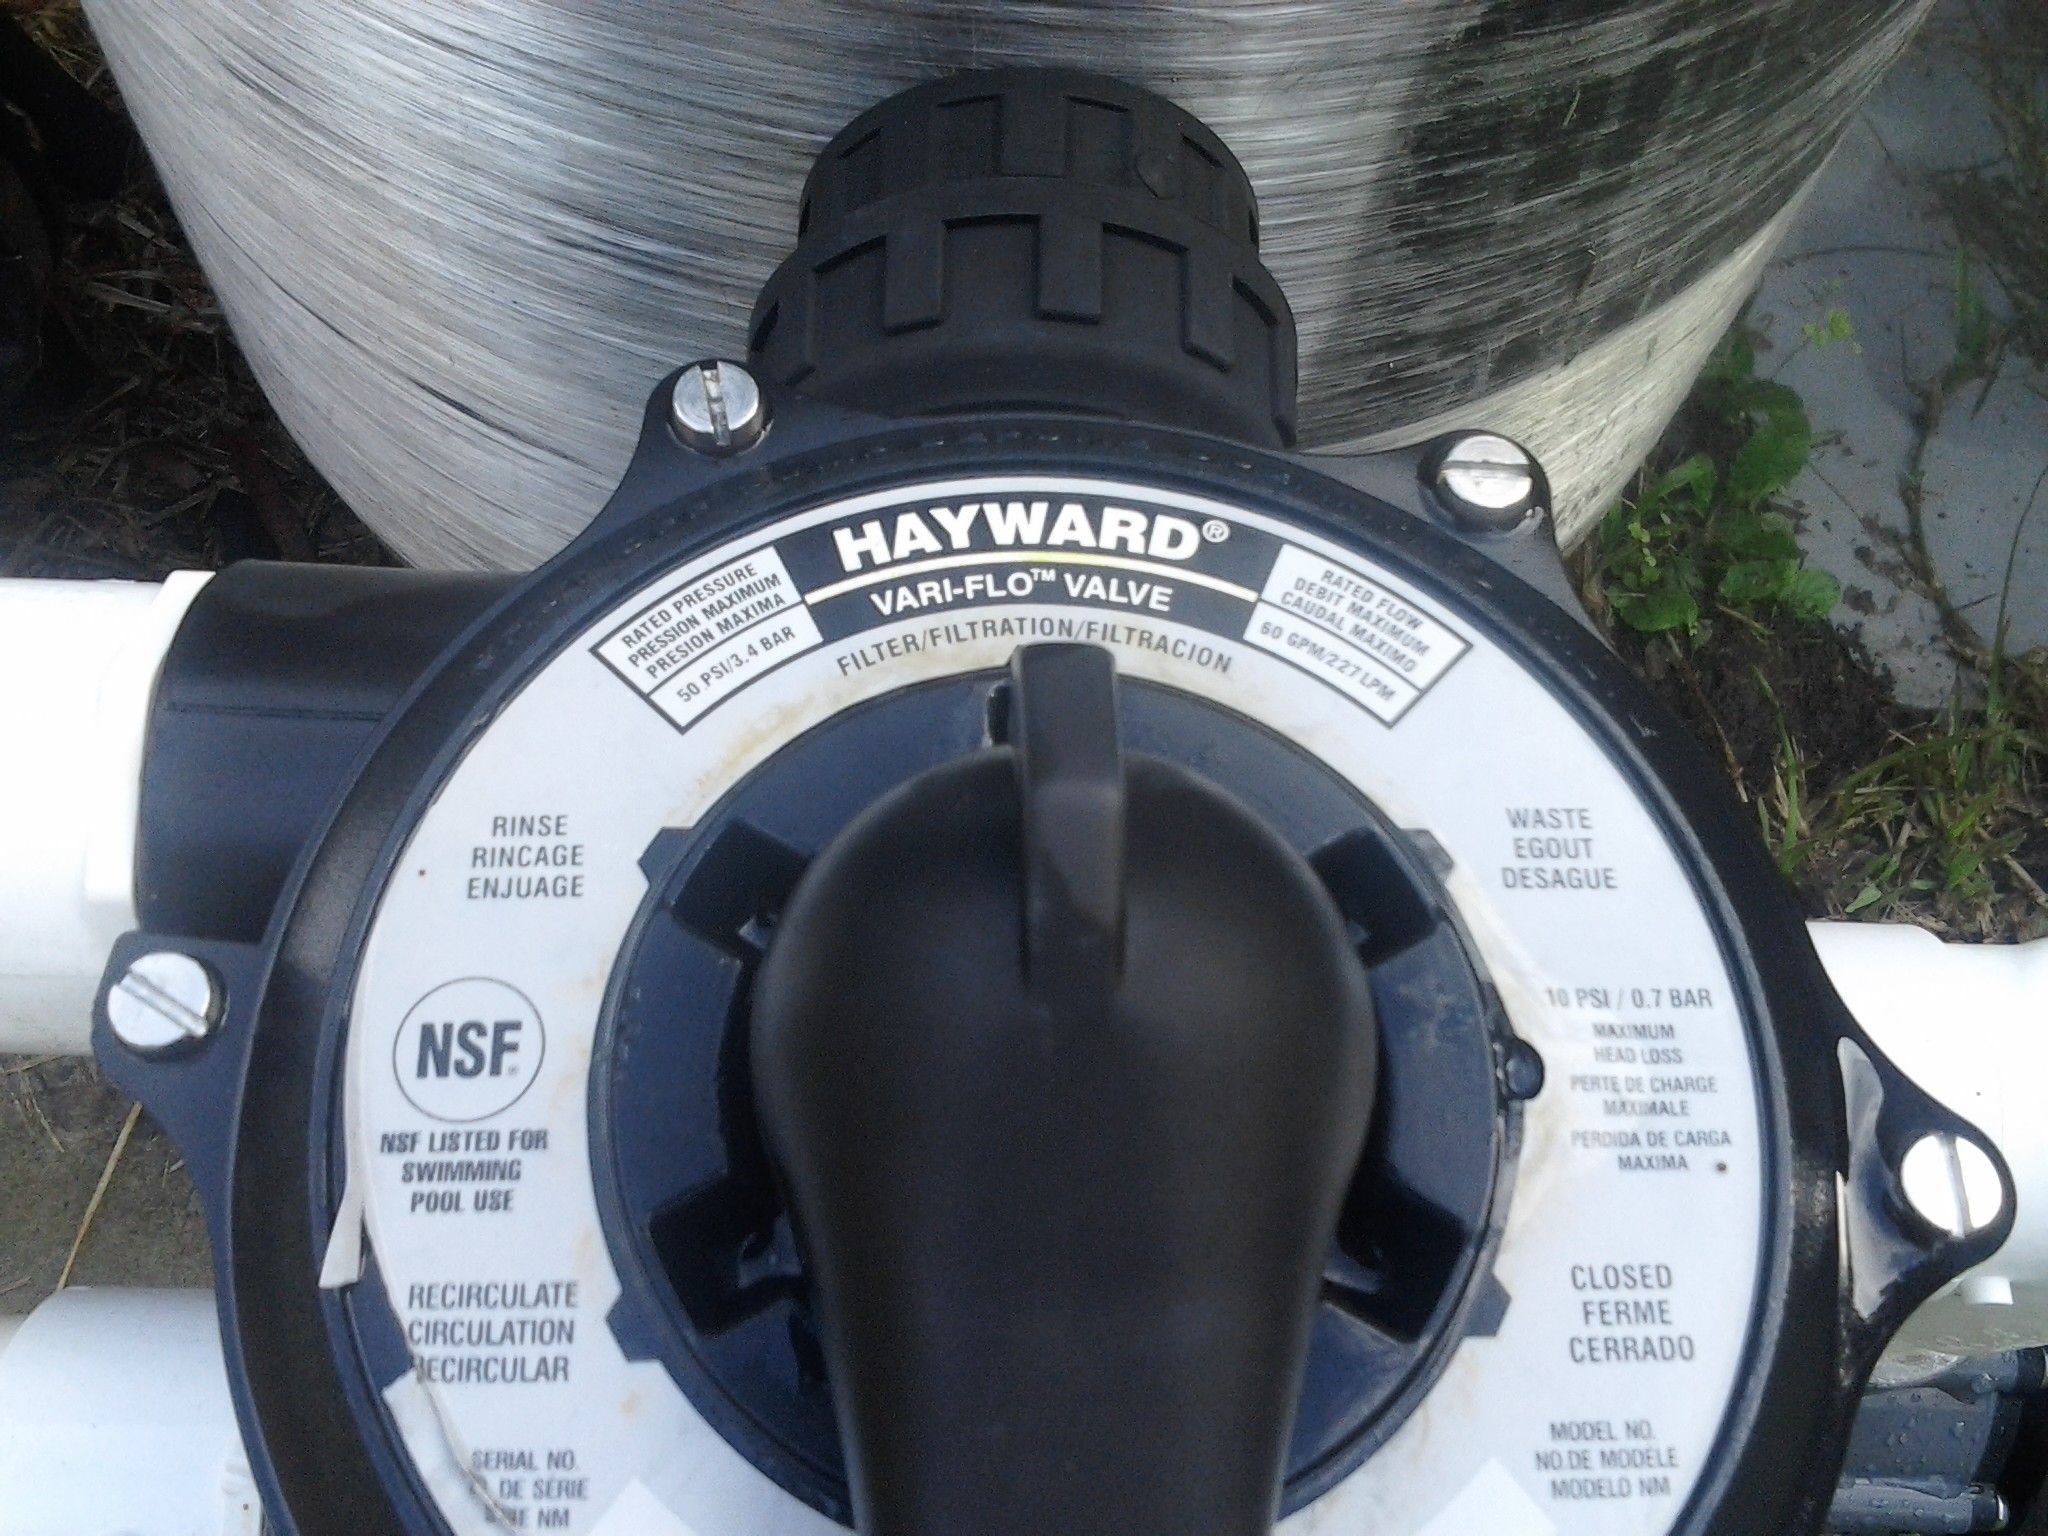
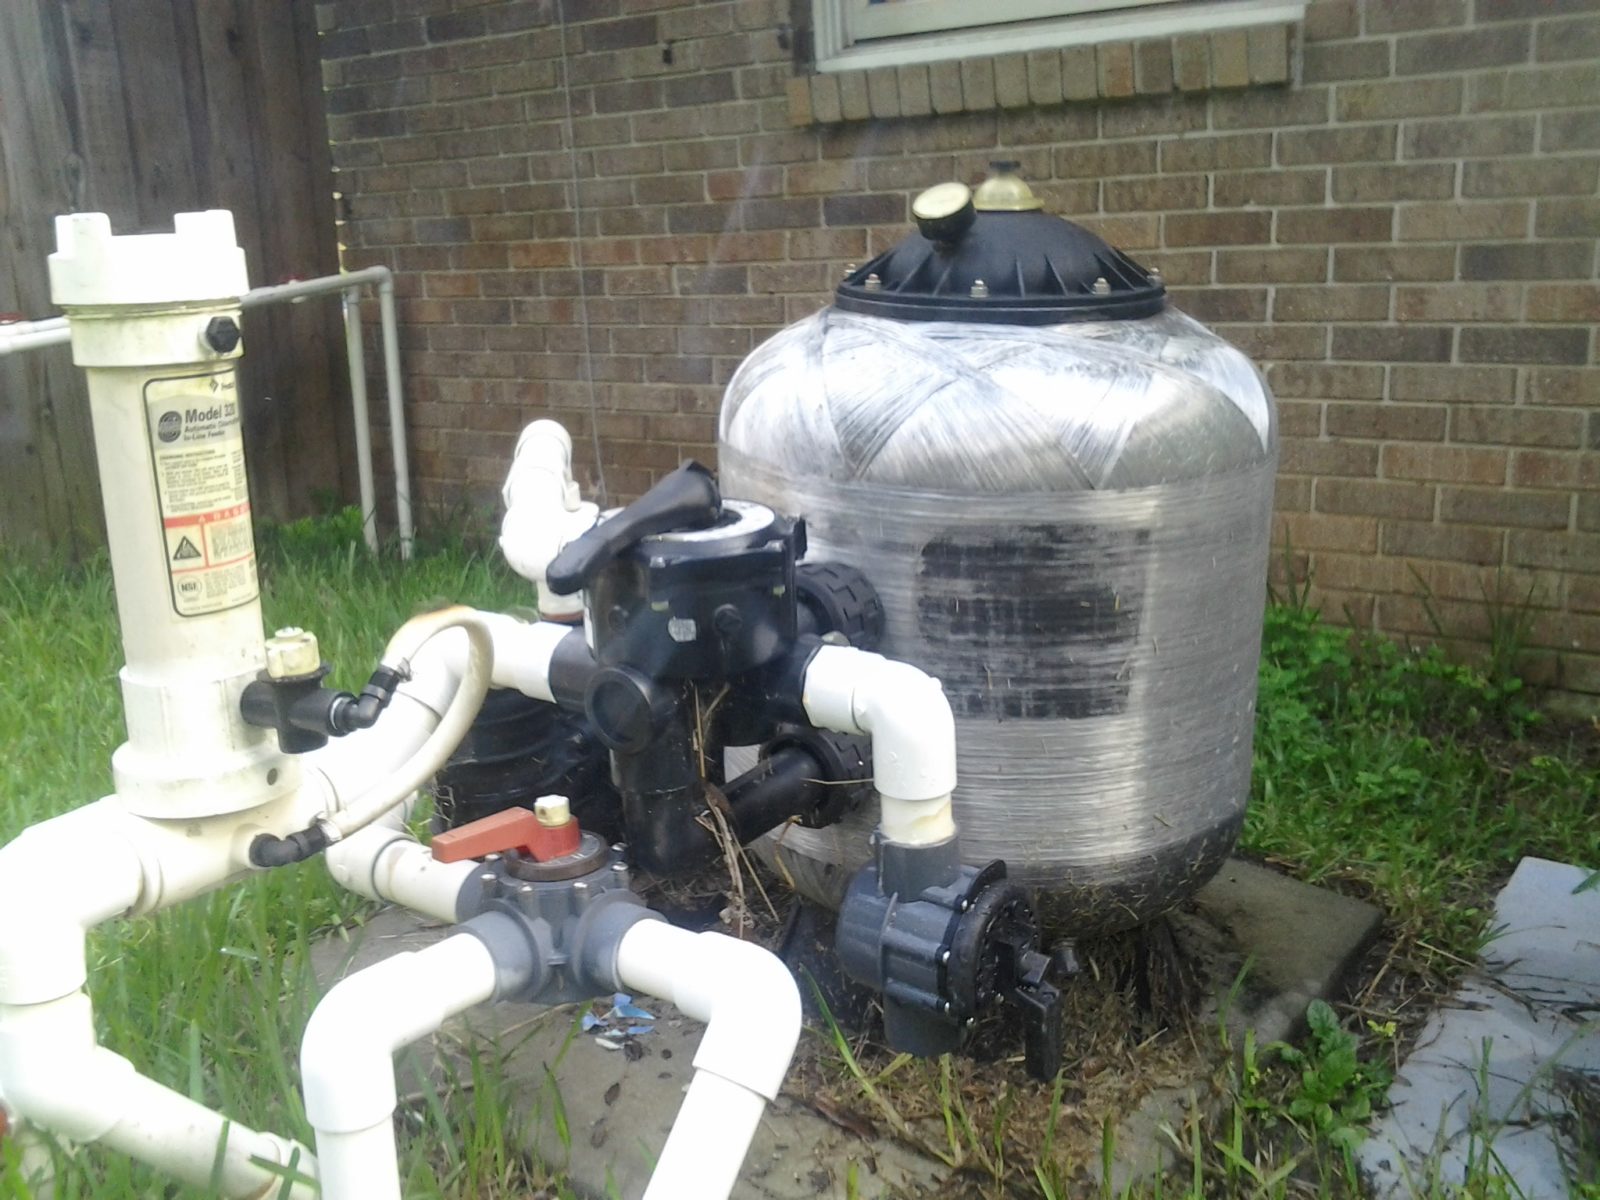
The multi-port valve is an extremely common culprit. Inside the valve, beneath the key assembly (aka: rotor assy or valve plug) sits a spoked gasket that somewhat resembles a bicycle wheel. This gasket is known as the spider gasket. The gasket and spokes sit within a grooved section in the base of the valve. If the gasket is completely shot, not only will you see sand coming back into your pool, you will also notice water leaking from the waste, or what some call the backwash, port on that valve while the pump is running with the selector of the valve handle in the filter position. If you do not see water exiting through the waste line, that only means that the entire spider gasket is not shot. It is not uncommon to see a single rubber spoke from the gasket lift from the grooved area and allow water to go in directions that it shouldn’t go. When that happens, this too will often allow sand to come back into the pool. The solution in this case is simple. Replace the spider gasket. HINT: Before you remove the top of the valve, mark the valve and cover so you will be sure to reassemble in the correct position.
If the spider gasket is in good shape, another possibility is the spring beneath the valve cover that sits upon the stem of the rotor. As these get older, from normal wear and tear, the springs spring may have sprang and sprung. This should be obvious before the valve cover is even removed because the handle will sit sloppy and have a lot of play in it instead of taking a bit of effort to lever the handle allowing the selector to sit firmly at the intended operation choice. It is a good idea while replacing the spring (if needed) to also replace the teflon washer that sits beneath the handle itself. HINT: It will take a bit of muscle and hand strength to put this thing back together after the handle has been removed. Uneven force will put the stem of the rotor at risk.
The rest or the things we should check are inside of the filter, but don’t worry, we are not up to digging yet. Most sand filters have a length of small diameter tubing, called a vent tube. This tubing, which attaches to the lateral hub and extends above the sand bed into the top of the inside of the filter, serves as an air relief for any air that may have found its way into the lateral hub. If the tiny screen for the vent tube is damaged or had become dislodged, this would also allow sand to come back into the swimming pool.
If we haven’t identified the reason sand is coming back into the pool yet, now it is time to dig. The remaining internal components (beyond the vent tube) we need to survey are the laterals, stand pipe, and hub assembly. Unfortunately, these are all buried in the sand bed. The best method for removing the sand from a sand filter is through use of a shop vac. You should be wearing an N95 Niosh mask at a minimum when handling filter sand. The sand is a manufactured product made from silica, we do not want to inhale any of that dust.
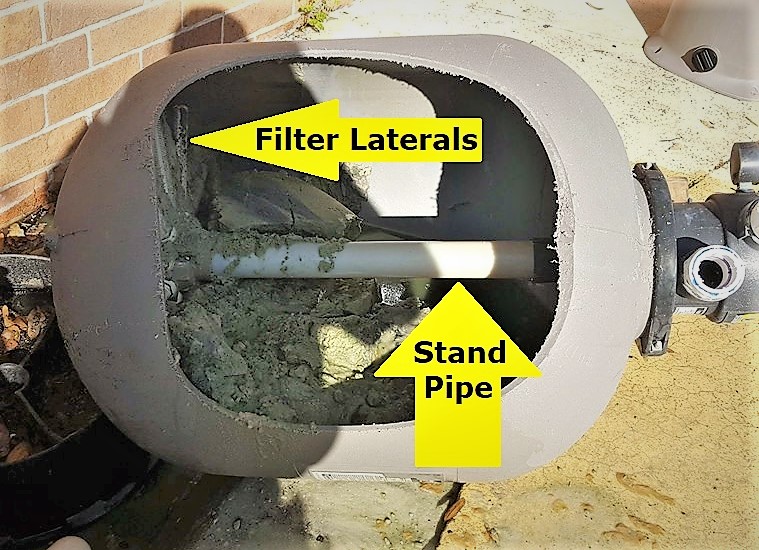
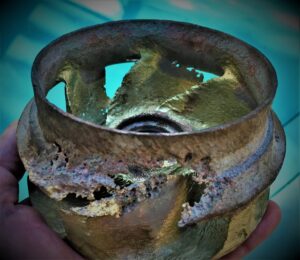
Each piece, as shown above, will need to be examined closely for even the slightest imperfection. It is amazing how much sand can make its way through a small crevice inside a filter that is under pressure. Closely scrutinize each of the small cylindrical laterals. Un-thread them from the hub and fill each with a tiny amount of sand. Then, with your hand covering the threaded opening, shake the lateral. If sand passes out, sand can pass in. You’ll need to replace each one that can not pass your test. Remember, The laterals have tiny slits that are small enough they will allow water to pass through, but will bot allow sand to get in.
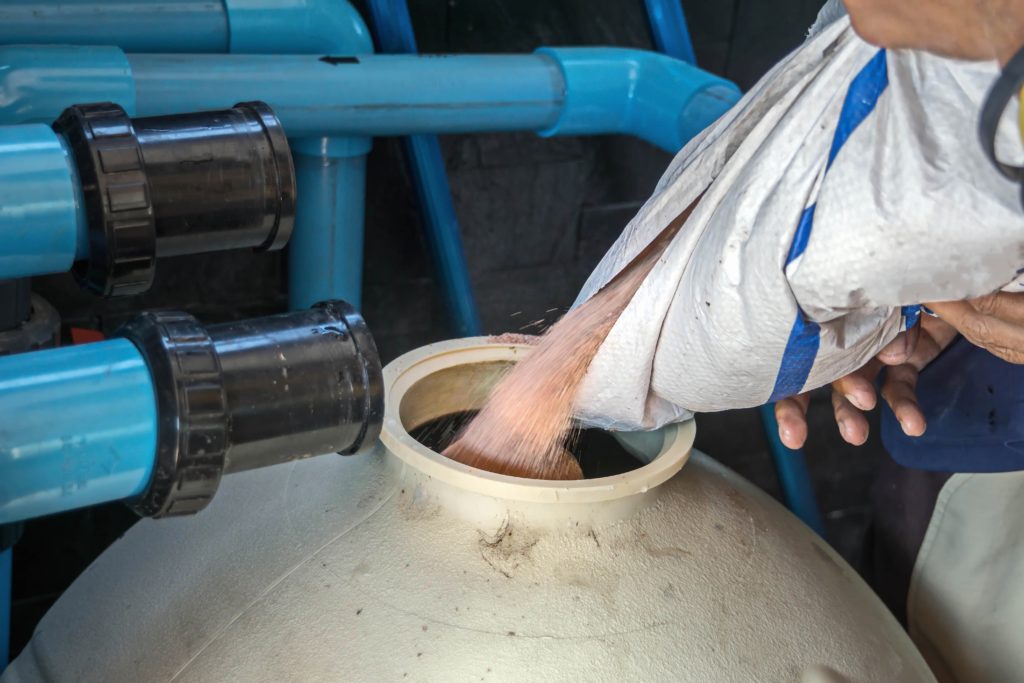
A couple of things before you replace the sand. Generally the sand in a swimming pool sand filter is replaced once every five to seven year. However, as we already have all the old sand out it is a good time to replace with new. The sand we use in our filter should be swimming pool filter sand, specifically (unless your manufacturers instructions state otherwise) 20 grade silica sand is what is recommended. We can not use play sand, beach sand, etc. Each grain of sand is designed to be a specific size and shape. We will want to make sure that we have our N95 niosh mask (unless the manufacturers SDS sheet recommends alternative PPE) on again for this process.
Before you add the sand, fill the tank halfway with water. This will deaden the impact of the sand upon addition so that a lateral is not damaged in the process. Nothing sucks more than removing sand and replacing a lateral only to have to do it again because the new sand broke one. Always add the amount of sand listed on the filters data plate (label), no more no less. This is a specific amount designed for optimal performance. If you can not read the label and do not have the original owners manual, you will likely find a pdf available online. If we have no means of identifying the filter make and model, you may add sand up-to the halfway point, but no higher.
I hope this saved you some digging ? and a lot of time ⏳
Similar Story: Pool Tools the Pros Use


Pingback: How Much DE Should I Add? ⚖ - Pool Operator Talk News🗞